By Matt Maziarz
PHOTOS BY BRITTANY MAZIARZ
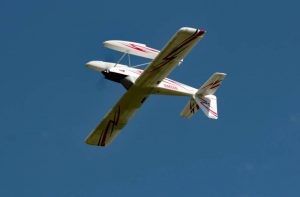
NEED TO KNOW
MANUFACTURER: E-flite
DISTRIBUTOR: Horizon Hobby
TYPE: STOL Specialist
FOR: Any pilots with limited experience
MINIMUM FLYING AREA: Ball Field
PRICE: $249.99 (For the BNF as tested)
NEEDED TO COMPLETE:
The only things needed to get the BNF version of the Timber into the air are a 5+ channel DSMX/DSM2 radio, a 3S 2200mAh LiPo and a compatible charger. The PNP offering of the Timber from Horizon requires a radio, receiver, LiPo and charger.
AUTHOR’S OPINION:
At the time of this writing, I had the Timber out of the box and in the air for roughly four weeks. Even my new limited role as “digital only flight jockey”, I still manage to get get out to the field every weekend with no less than 6 models in tow. The one model that has made the trek every weekend, since I cracked that packing tape off the box, is the Timber. Whether I want to cut loose with some wild scale aerobatics or touch and go til the cows come home, it is now my favorite sport model. The two-piece wing makes it easy to transport and factory labeled wire harnesses make field setup a breeze. The best part though, are the STOL capabilities of the Timber and its ability to take on punishing field conditions that would send other aircraft (and their gear) scrambling.
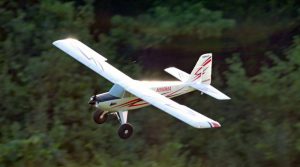
PROS
- Floats and NAV lights included
- Amazing STOL performance
- The BNF version includes SAFE for training pilots
- 10+ minute flight times
CONS
- Foam finish could be better
- Belly mounted battery … booooooo
SPECS
WINGSPAN: 61 in. (1555mm)
WING AREA: 559.5 sq. in. (3610 sq. cm.)
WEIGHT: 50.3 oz. (1400g)
WING LOADING: 12.95 oz./sq. ft.
CUBE LOADING: 6.6
LENGTH: 40.9 in. (1040mm)
SERVOS: (6) Spektrum A330
MOTOR: E-flite 10 Ultimate 2
ESC: E-flite 40 amp
PROPELLER: 12 x 4
KEY FEATURES
- The light wing loading, combined with the slotted flaps on the Timber give it awesome STOL capabilities. I took my first few flights without adding the slats to the leading edge because I don’t think it needs them. Drop the flaps to half, punch the throttle and blip the elevator up for a takeoff that chews up all of 18-24 inches … and that’s without a headwind!
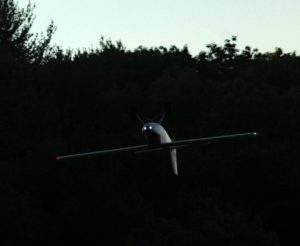
- Bush planes are known for their ability to deal with adverse conditions, one of which being night flights. Make your dusk sortie with the sun just above the horizon and rest assured, you’ll bring the Timber back, straight on the numbers, with the bright wingtip, belly and top lights.
- What STOL sport model would be complete without a set of floats, right? Horizon has long been producing such models in a wide variety of scales, but the floats were always an optional purchase. Not so with the Timber as it comes with them and they feature dual rudders!
- The newest generation of the flight controllers, AR636A as found in the Timber, allows the user to bind the aircraft with AS3X and SAFE or with just AS3X. That’s a big plus in my book, as experienced pilots might get turned off by the limited throws as allowed by the SAFE system.
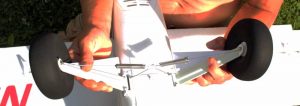
- The bush-style wheels on the Timber make pretty much any surface suitable for takeoff and landing. To add to the realism and ability, the gear mounts reside on hinge pins and each strut is tied to the other via a sprung x-brace. That means even if you bounce it in or encounter a small rut, the Timber will stay on point. I’ve heard of folks breaking the springs at the 90 degree bend within the retainer, but I have yet to encounter any issues, even after dozens of touch and go’s.
- The two piece wing of the Timber makes it super easy to store and transport, even with three leads dangling out of each root (LED’s, Flaps, Ailerons). E-flite labels each wire, so field installation is a breeze. Additionally, both the flaps and ailerons are driven by concealed pushrods, giving the model a nice and clean scale appearance.
INTRODUCTION
Horizon, of late, has been on a tear with the foam releases and while they normally focus on sport aerobats and warbirds, the Timber takes things in an entirely different direction … and that’s a good thing. This STOL gem is perfect for lazy afternoon flights, even from the smallest of fields or body of water. The price is a bit high for a park-sized high wing BNF, but the inclusion of both NAV lights, floats and flaps make it easy swallow. The performance envelope is also quite wide, especially if you make a few choice modifications (to the BNF model). Let’s take a closer look …
The model arrives boxed up, nice and secure. However, once I pulled the fuse out of its enclosure, I was shocked to see the belly light dangling from its intended perch by about 6 inches of wire. A quick jump to the Horizon website revealed that I wasn’t the first to experience the distended belly light. I dabbed a bit of Fix N’ Flex from Deluxe Materials on the light mount and stuffed it back into place and was good as new. My only two other complaints are: 1) One of my four landing gear mount screws wouldn’t sink in all the way, obviously due to the mount not being tapped deep enough in that hole. I simply snagged a slightly smaller screw from my pit box and was good to go. 2) The entire model is attractive, yet the molding and finish of many of the surfaces leaves much to be desired. After my first few flights, I spent a good hour or so slicing rough flashing bits off the tail section alone. The wing joiner could be a bit more snug as well. These three qualms I alluded to in no way affect the performance of the Timber, which is amazing. The build is fairly simple and could take most modelers far less than an hour to complete, so make sure you get that flight pack on charge before breaking the box open.
PRO TIPS:
- Try the Timber out for yourself without the slats. You could always add them later if desired, but the there is a bit of yanking and gluing involved if you want to install or remove them. I found the STOL capabilities to be astounding, even without the slats. Plus, it’s a heck of a lot easier to transport without those small strips of foam on the wing halves.
- Shove that battery all the way forward. I found that even with the wheels on, the Timber seems to be a bit heavy in the tail. With the battery crammed all the way forward, up against the bulkhead, the model balanced out perfectly. I did have to add about a quarter ounce of weight to the inside of the cowl when I had the floats on it, but aside from that, the model flies amazing well from both land or sea.
- If you are an experienced pilot who loves to bust some aerobatics, but also putter around the patch at a lazy pace in true STOL fashion, get the PNP model and add a receiver without AS3X. The stability system works in the background to keep the model smooth and on track, but it also somewhat limits the amount of travel you can dial into the control surfaces. If you want to explore the full spectrum of flight possibilities with the Timber, set some expo and nothing else and let it rip.

ASSEMBLY
The final build begins by installing the landing gear … or floats. I used my StandBox cradle to keep the Timber on its back, with the top of the rudder more than clear of the table top. Once the four screws are secure for the main gear, you can join the two strut assemblies with the small plastic clamp. I found it easiest to roll the model over at a 45 degree list to have the topside strut leaning towards the bottom one, making for an easy install sans an extra set of hands.
Once the gear or floats are on, you install the horizontal stabilizer and elevators. The two tail halves ride on a small carbon spar, are self aligning and interlock once seated. No more tape on the tail feathers … yay! After popping the quick clevis off the elevator pushrod, place it in whichever hole you like (inner for more throw, outer for less) and lock it back down with a twist.
 With the tail all situated, the main wing is all that’s left to finish the build. I found it easiest to assemble the wing and hold it in place with the bracket and screws, placing it on the fuse just aft of the opening on top and joined up the wires. The LED’s in both the wings and the receiver Y-harness are labeled either L1 or L2, but the aileron and flap leads are only labeled on the wing sides. Common sense (with Spektrum receivers) dictates that the Y-harness on channel 5 is for the flaps while the other is for aileron. Once all connected, bind the model to your transmitter using one of the prescribed methods in the manual (1: bind plug in, power model on, remove plug and bind model for AS3X and SAFE or 2: place bind plug, power model on, bind model, then remove plug for AS3X only). If using SAFE, you must program whichever switch you want to activate the different flight modes. Once bound, power the transmitter on, then the model back on. Once initialized, pull both sticks down and in and hold them there while toggling the desired switch back and forth at least five times. After that, it’s as simple as stuffing the bundle back down into the fuse while placing the wing. It would be nice if there was some sort of shroud over the elevator and rudder servos to prevent any wires interfering with them, but shoving the veritable bird’s nest of wires as far forward when attaching the wing.
 IN THE AIR
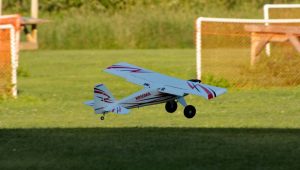
I performed my maiden flight with the model bound in AS3X only mode and the factory recommended flap/elevator mixing dialed into my Spektrum DX6. To hit the proper CG point, I had to stuff the E-flite 2200mAh 3S all the way forward, right up against the ESC leads. After a range check and confirmation of proper deflection, I taxied the Timber out onto the centerline of the runway holding a fair amount of up elevator and making sure not to go too fast as the massive lift provided by the wing and flaps at mid would lift the model in a heartbeat. Once in position, I goosed the throttle, fed in a bit of up elevator (or so I thought it was just a bit) and the Timber leapt from the grass, consuming all of 18 inches of runway, and assumed a straight nose up attitude.
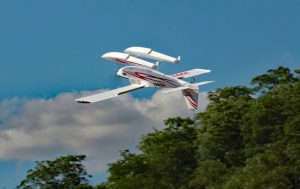
Thankfully, I was on point that day and managed the level the model off with the elevator while stowing the flaps, powering up to gain some altitude to check the trims. All I needed was a click of left aileron and the Timber was floating hands-free at just around ¼ throttle. I flew a few circuits around the field to get a feel for the model and was pleasantly surprised. The elevator has mucho authority and the manual specified rates and expo seemed spot-on. The ailerons make for some mighty fine scale turns, but the Timber will need a bit of altitude if rolling with them alone. Things were a bit tighter when rolling if coordinating a bit of rudder throughout. Snaps looked great and were super easy to perform and the model feels just as planted while inverted as it does upright.
 While still up a bit, I dropped the flaps to mid position and, slowly (thanks to the recommended speed setting on the flap servos), the Timber lifted its nose. Rather than trimming the model on the elevator, I pulled the flaps back up and came around for my first approach … overshooting the numbers by about 100 feet! Even without the flaps deployed, the Timber will float for days. Before powering back up, I made note of how effective the ailerons and massive rudder remained, even at incredibly slow speeds. A quick touch and go and I made another circuit to line it up again. This time I killed the throttle while still on the downwind leg and then made a tight turn into the tarmac. This time, I still overshot the entry by a bit, but the Timber touched down just past me and rolled out ten feet or so.
I popped a fresh pack in and dialed the elevator to flap mixing a little heavier. The manual states to use 9% elevator at mid flap and 13% at full deflection. I increased those amounts to 13% and 17% respectively and headed back out. This time, I set my timer for five minutes, flipped the flaps to mid and slowly rolled on the throttle without so much as a tug on the elevator. With just a touch of right rudder, the Timber performed a perfect scale takeoff, rolling for twenty or so feet before lifting the tail and slowly creeping skyward … and this was still with nary an input from my right hand! So, the new flap mixing was spot on. Retracting the flaps once more, I put the screws to the Timber to see what this new 10: Ultimate 2 motor was worth. The model has plenty of grunt and can get up and go with a quickness. Rolls become much more axial at speed (duh) and the adrenaline factor is cranked to 11. Knife edge is possible and easy to do at anything above 50% throttle on factory rates, though there is a bit of coupling towards the gear with those giant tires hanging down there.
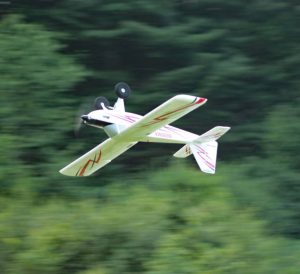
Low and slow and touch and go’s are where it’s at with the Timber. Drop the flaps all the way down to their maximum and putter the model in for a bounce or a roll without even needing to touch the elevator. With the Timber balanced and trimmed properly, I could simply chop the throttle, monitor the rudder and ailerons, let the mains settle, feed a little juice into it to keep the tail up and then throttle back up for another smooth liftoff. Likewise, Inverted low and slow passes are about as easy as they come. I’m no 3D master, but I was able to get the top of the rudder as close as six inches or less on some passes.
Subsequent flights were performed with the travel opened up to 130 on the elevator and ailerons. With more travel, the Timber will hover, but do nothing even close to an anti-torque roll. The 10 motor has plenty of rip for level flight and mediocre vertical, but limited bailout grunt, so keep the diligence up and on the sticks. I found the model always tended to lean towards flat inverted once the ailerons and elevator got mushy, so I would simply sacrifice a foot or two of height to pull out straight and inverted. With the increased travel, loops were as tight as I wanted them, from scale to extreme, with little rudder required to keep it straight.
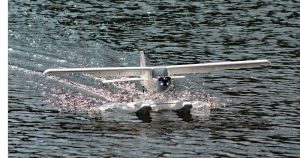
On floats, the Timber is a joy to fly. Takeoff and landing are easier than stringing the dual rudders to the pull-pull horn at the base of the rudder. Each rudder is spring loaded, so you simply pull the line to tighten the spring until each rudder is straight, place the pin in the hole and tighten the set screw. The setup is a bit weird, but works incredibly well. Using the same trims and rates as I did while on land, I did have to add some weight to the nose to get it balanced, but I wasn’t at all worried about the miniscule gain. Inverted with floats isn’t something you’d normally see, but the Timber will hang on its floats all day, with only a slight rock being evident with the extra weight on the belly.
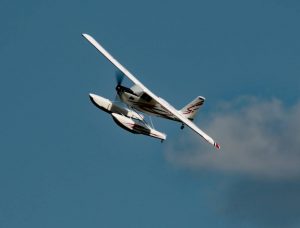
 One the water, with a mild breeze, the Timber is a joy to taxi. Being sure to keep on the elevator, the dual rudders have awesome turning power, so you won’t be trekking to retrieve your model if the wind picks up and it weathervanes. Being cautious, yet deliberate on the tail sections and with the flaps at mid, I advanced the throttle and watched the Timber climb up on step in just a few feet, just like on land. I pushed it a little harder and watched the model climb out in glorious amphibious fashion. Handling in the air was much the same as with the wheels on it, only a bit slower with the rolls and loops. If you can believe it, hovering was actually easier for me with the floats on, though I still kept it up a bit. Touching down on floats is always a nerve racking experience for me, but just as with the maiden, I lined it up and basically let the model do the rest. With limited chop on the water, I kept the tips just above parallel at ¼ throttle and waited for contact. Once the water touched, it did grab just a hint so a slight jab of up elevator and easing slowly off the throttle once settled makes the Timber about as easy as any float plain to land. I un-puckered and took back off for another series of worry-free touch and go’s aqua style.
A few weeks after my maiden, I did get the opportunity to (re)bind the model in SAFE mode for a couple of quick flights with a novice pilot. I must say, the Timber is the perfect model for anyone with very limited flight experience. Basically, if you can keep from banging the sticks, you’ll be fine with SAFE and AS3X. The SAFE system does tame things a bit, but that’s exactly what training pilots need and want. Selecting a bailout switch is as easy as holding both sticks down and in while cycling said switch five times. I did re-bind the model once finished with the lesson to disable the SAFe and only employ AS3X, but I do plan on putting a regular receiver sans flight control capabilities in there in the near future.
 THE LAST WORD
Ask anyone that knows me, read any of my previous articles, check the majority of pics on my Facebook page or just take my word for it; I am not a high-wing type of fella and when I ask folks to guess what my favorite new model is, they usually retort quick-like with an Edge 540 or some hot rod warbird. I toss them a flippant grin and then tell em’ it’s a bush plane … errr, float plane … errr, trainer … errr aerobat. The Timber really is all of those things and while the price begets a fit and finish that’s still a stones throw or two from what you actually get, it only takes a little tinkering to “scale off” the factory cut edges and tidy up any other issues (ie, the umbilical cord in my model). The Horizon support after the sale is top notch, should you encounter any debilitating flaws, and parts sourcing for wear and tear as well as crash damage are easy to get. Best of all, you can putter around for 10+ minute on a freakin’ 2000mAh 3S pack!
WE USED:
RADIO: Spektrum DX6 transmitter
BATTERY: E-flite 3S 2200mAh
LINKS
 Fly RC Magazine WE LIVE RC
