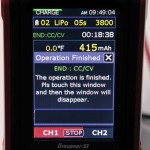
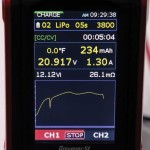
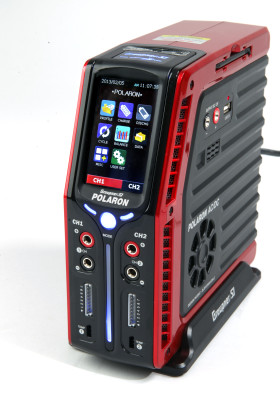
 There are tons of chargers on the market and they all pretty much accomplish the same task: to charge your batteries. The Graupner Polaron AC/DC charger is definitely not your typical charger, It solves a few problems with perhaps the biggest one being space. Most chargers are wider and certainly take up some valuable bench space, whether at the field, race track or in your workshop. The design of the Polaron eliminates that, using its spacesaving vertical design that is only around 3 1/2 inches wide. The charger is capable of delivering 240 watts of output power (120W per channel) when using a suitable DC power supply. This equates to roughly eight amps of charge current per channel (with 15VDC input). When using the integrated AC power supply, the charger will supply up to 60 watts per channel; approximately four amps per channel. This is more than enough power for a large majority of the battery packs that you will use. One thing I was excited about was that this charger supports up to seven cells for LiPo batteries. Many chargers on the market only support up to six cells and if you fly larger 800-size helicopters like I do, that run on 14S, it is nice that I can charge both batteries (one per channel) on the Polaron.
KEY FEATURES
- Compact standing-type design.
- Easy to use 3.0 inch full color TFT LCD display.
- Capable of a maximum of 120W charge rate per channel.
- Supports LiPo, LiFe, LiLo, NiCD, NiMH and Pb battery chemistries.
- Each channel supports 20 memories.
- Additional functionality includes ESC setup, tire warmer, motor test and a USB charge jack.
INCLUDES
- Polaron AC/DC charger
- AC power cable
- EH to XH 7S adapter board and 7S cable
- USB cable
- DC input cable
- Two temp sensors
- Two charge cables
- Two alligator clips
- Charger stand
- Manual
A CLOSER LOOK
The case of the Polaron is beautiful, constructed of both metal and plastic components. My charger is powered-coated red, but they offer blue, black, orange and silver as well. On the front of the charger you have a 3-inch TFT LCD full-color touch screen display to control the operations of the charger.
There is a plastic pen for the touch screen that is snapped into the right side of the charger frame to make it easier to people with larger fingers to operate the touch screen. Below the LCD screen are indicator LEDs for each channel as well as the charger outputs for each channel and balance and temperature ports. There is a button on the center of the charger under the screen to select between channels and to initialize the charger. The charger comes with two temperature sensors to monitor the batteries for each channel. On the right side of the charger, there are outputs for 12VDC as well as a 5V 1 amp USB output. I love the USB output as it allows me to charge devices like my iPhone and iPad. The cooling fan is also located on this side of the case. The back of the charger has a second cooling fan, 12VDC inputs, the AC power cable input and the power switch. On top of the charger there is an ESC configuration socket and a mini USB connector.
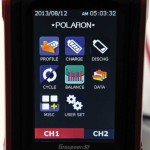
My intention here is not to rewrite the manual, as you can visit Open Hobby’s website and download the full manual in color PDF format. But I did want to give you an overview of the functionality beginning with the main menu screen that you see when you power on the charger.
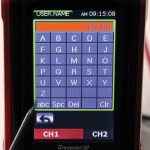
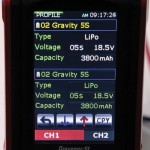
The Profile page is the main function page for the charger. It is where you can assign the battery a name; select the type of battery, capacity and number of cells. You can also assign the memory number so you can easily recall this program for this specific battery in the future.
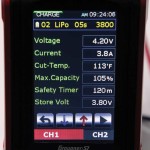
The Charge screen is used to initiate the charging process. Depending the type of battery you set up, you are shown parameters
including cell voltage, charge current, cut-off temperature, maximum capacity of the battery, storage voltage and safety timer.
You can select the charge mode and even a delayed time setup from 1-150 minutes. It will even display the milliohms of the back which is handy for determining the overall battery pack health. The Discharge screen allows you to setup the Polaron to discharge your batteries to a specified cell voltage for storage purposes. As with the charging screen, you are able to monitor the discharge current, voltage, battery temperature and the milliohms of the battery pack.
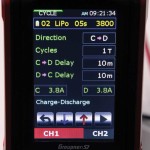
The Cycle screen allows you to cycle your battery packs. In some cases you might want to discharge a pack and then slowly recharge it to full capacity. NiCD and NiMH battery packs develop memory over time and it is necessary to obtain the maximum performance of the pack to fully cycle them every once and a while.
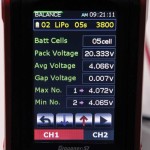
On really cool feature of the Polaron is the Balance page. There are three modes that allow you to monitor the voltage of each cell. The first mode shows the basic data of the battery, the second mode shows a table with the balance voltage and milliohms of each cell in the pack.
MANUFACTURER: Graupner
DISTRIBUTOR: Open Hobby
TYPE: Dual output, 240W
PRICE: $299.00
SPECS
POWER SOURCE: 100-240VAC, 11-15VDC with optional external DC power supply
DISPLAY: TFT 3 in. LCD w/touch screen
BATTERY TYPE AND CELLS: NiCD/NiMH: 1-14 cells per channel; LiPo/LiFe/LiLo: 1-7 cells per channel; Pb: 1-12 cells (2V/cell) per channel
OUTPUT: 2 channels (DC: 120W x 2CH; AC 60W x 2CH)
CHARGE CURRENT: .1-8A (100mA steps)/Max. 120W
DISCHARGE CURRENT: .1-5A (100mA steps)/Max 30W
CYCLING: Discharge, charge to discharge and discharge to charge
BALANCING CURRENT: Max. 300mA
USB: 5V output (5V/1A) B-type
SUB FUNCTION: Motor test, warmer, ESC setting
FIRMWARE UPGRADING: External mini-USB
PC COMMUNICATION: Data Logging
COOLING: Two dynamic fans
MEMORY: 20 memories per channel (40 total)
DIMENSIONS: 3.47 x 8.00 x 7.73 inches
WEIGHT: 54.18 oz.
The third mode shows a bar graph of each cell so you can visually see the capacity of each cell in the pack. The Graph page shows you the normal data, cycle data and graph data for the battery pack(s) being charged, discharged or cycled.
The User Setup page lets you configure parameters of the charger including the finishing sound (10 types available), the sound duration (on, off, 5 sec, 15 sec and 1 minute), whether or not the charger beeps when you touch the screen, the LCD brightness, the temperature scale (Fahrenheit or Celsius) and the sound volume. The second configuration screen lets you setup the AC and DC input values. You can also configure the wattage setting, low voltage error limit, voltage and current limits
and the output sharing of between the two channels. You can also setup the date and time, two separate clock alarms and the user name.
The final screen is the Misc page. You have options in this page for the brushed motor setup so you can break in a brushed motor. There is a Warmer Setup option where you can program the charger to warm up your batteries for cold weather flying days and you can also warm up your tires. The last section of the Misc page is the Speed Controller Setting screen where you can setup parameters on Graupner ESCs.
THE LAST WORD
I have been using the Polaron for a few months now and I love it. It is very easy to use and I really like all of the data that it gives me on my battery packs. Since I use a variety of battery types besides LiPos, I like the flexibility that this charger gives me. It takes up hardly any room on my bench and has other options that you don’t typically see on chargers. I read once that Graupner is a world leader and innovator in battery charger technology and after using the Polaron, I can certainly see how they earned this reputation. ?
CONTACT
OPEN HOBBY openhobby.com
 Fly RC Magazine WE LIVE RC
