By Kevin Siemonsen
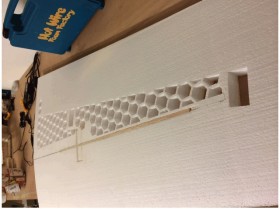 It sounds odd wanting to lighten foam; especially when foam (at least to me) isn’t thought of as being heavy. However, in terms of a large-scale plane, the wing cores can add up to be over four pounds. The roll of foam in a large scale wing is to provide aerodynamic shape and a little strength. A foam core wing is mostly dependent on its balsawood sheeting for its strength, where an all-wooden wing relies on spars to keep things rigid. The strength of a foam core wing can be increased by adding some structure and composites to distribute forces and reduce stress points. Ultimately’ you’re looking for the wing to be stronger and lighter than before the lightening process.
A little insight on the mechanics of the wing will give a little better understanding of structures. When forces are applied to a wing, there are compressive and tensile forces exerted upon the structure. The bottom surface of the wing under a lifting load is under tension, essentially pulling the structure taught (weather it be a spar or sheeting). It is easy to engineer structure for strength under tension and few strands of carbon fiber chord along the spar will add significant strength.
The top surface of the wing under a lifting load is under compression, essentially pushing the structure together. An element of rigidity is required in the structure for compression loads, adding to design complexity. To better understand the mechanics of a compressive load, visualize a short section of plastic drinking straw held between your thumb and forefinger. If you were to apply a compressive force by squeezing your thumb and finger together, you would see the straw flex and eventually kink. A structure is at its strongest point when it’s in a straight line whereas the more it bends, the weaker it becomes to the point of “kinking” where all strength is lost. A wing is only as strong as its ability to take compressive loads.
With all that jargon out of the way, we can now focus on foam! The key is strategically removing foam and adding some sub structure, maximizing strength and minimizing weight. The strongest part of a foam wing is at the root because it is the thickest point of the airfoil and it has the added internal structure of the spar tube. Stresses during flight are most concentrated where the wing spar tube ends. The key to a strong wing is to eliminate stress points and to distribute the forces over a larger area. Listed are points on just how to do it:
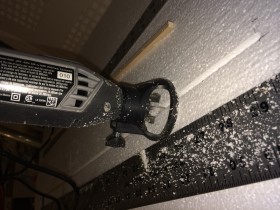 << The most important thing is to tie the wing tube into the wing structure. This is accomplished by routing out a channel with a Dremel tool fitted with a 3/32-inch Roto-bit. Route a slot from the surface of the core through to the spar tube cut out span-wise of the wing spar tube. This channel should be cut along the outer 1/3 of the spar tube. When gluing the wing tube receptacle, glue 3/32-inch end grain balsa filler span-wise with the wing tube receptacle.
>> Use the Dremel tool with a 1/4 cutter to rout out a 1/4-inch groove span-wise into the wing overlapping the sheer webbing. The groove cuts into the webbing at the spar tube and continues toward the wing tip until approximately two-thirds out of the wing.
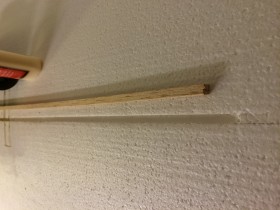
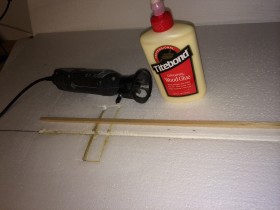 << Inlay a piece of ¼-inch square hard balsa in the groove with Gorilla glue or white carpenter’s glue on the top and bottom of the wing core. With the structure in place, the next step is foam removal.
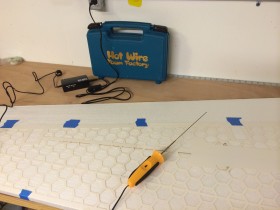
>> With the wing structure reinforced, it is now time to make templates for the top and bottom of the foam core. The templates provide guidance for the Hot Wire foam cutter to ride along. Typically, builders will cut a series of 1½-inch squares with ¼-inch separation, angled at 45 degrees to the span line. The templates are cut out of regular poster board with a razor blade. Some planning is required; keeping in mind the locations of the servos, spar tube, spars and wing core outline. (Note: in the photos, the templates I used featured hexagons cut using a laser cutter. Squares are much easier to cut manually when you don’t have access to a laser cutter). Tape the templates to each side of the wing core and get the Hot Wire Foam Factory hot knife plugged in and ready to go. I have used some “home brew” cutting devices and can honestly say after using legit Foam Factory tools; they are well worth the money!
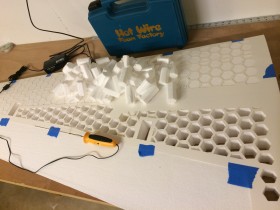 << Follow the perimeter of the holes in the template and foam cylinders will effortlessly fall out as you go. It is almost magic to see the foam disappear along the hot knife’s path as it glides through the foam. Once all the desired foam is removed, run carbon fiber “toe” along areas where reinforcing is desired. This should include the wooden structure as well as leading and trailing edges. Prep the wing skins for sheeting the wing cores. Apply resin to skins and use your preferred method (weight or vacuum bagging). NOTE: If using vacuum bagging, use less vacuum over non lightened wing cores to prevent the cores from being crushed.
It wasn’t until recently that I started building with foam cores and I couldn’t be any happier that I did. Stepping out of my comfort zone and learning something new has been extremely gratifying. It’s also reassuring to have the internet available to find answers and even better; check the forums to see what expert builders were doing. An excellent example of this is Trevor Brum from Canada. He is an expert builder and shares techniques on rccanada.ca for all to see. Hot Wire Foam Factory has been instrumental to my success and is an industry leading manufacturer of foam cutting accessories. Check out the Fly RC website to see a video of the Foam Factory hot knife cutting through foam like butter. I’m far from an expert at this stuff, but can honestly say I really like building with foam. It’s like any thing else though, the more you do it the better you get it. It was definitely worth taking the plunge and building with foam and I ended up with a new dilemma … what plane to build next?
LINKS
 Fly RC Magazine WE LIVE RC
